Feb 25, 2026
Fashion Concept Design: Part 2
Creating your model and sketching your designs

Introduction
Welcome back for Part 2 of this fashion concept design course. In this section, we'll explore the process of creating character models for your fashion concepts and translating reference material into original design sketches. While developing a character model to showcase your fashion concepts isn't strictly necessary, it significantly enhances the presentation and allows you to communicate the complete aesthetic vision behind your work.
Your character can help inhabit the lifestyle, attitude, and narrative you're building. This becomes particularly important when designing for specific contexts such as film costume design or game character development, where clothing must feel connected to personality and world-building.
Before we begin, ensure you have your reference board from Part 1 readily accessible. Maintaining visual connection to your reference material throughout the design process ensures you can stay true to your initial vision.
Sketching your character
In the sections below, I'll demonstrate my approach to character sketching. While this won't be a comprehensive character design tutorial (I'll reserve that for a dedicated course), I want to share a streamlined process of how I design characters.
The character I'm developing draws directly from the punk streetwear references explored in the previous article. I chose to express this aesthetic through her hairstyle, make-up tattoo artwork. Though I knew the garments would cover much of her body, incorporating visible tattoo elements adds a lot more personality and suggests a complete identity beneath the clothing. Details can also inform my design choices, a character with tattoos will help me design an outfit that can highlight these design details.
The Iterative Process
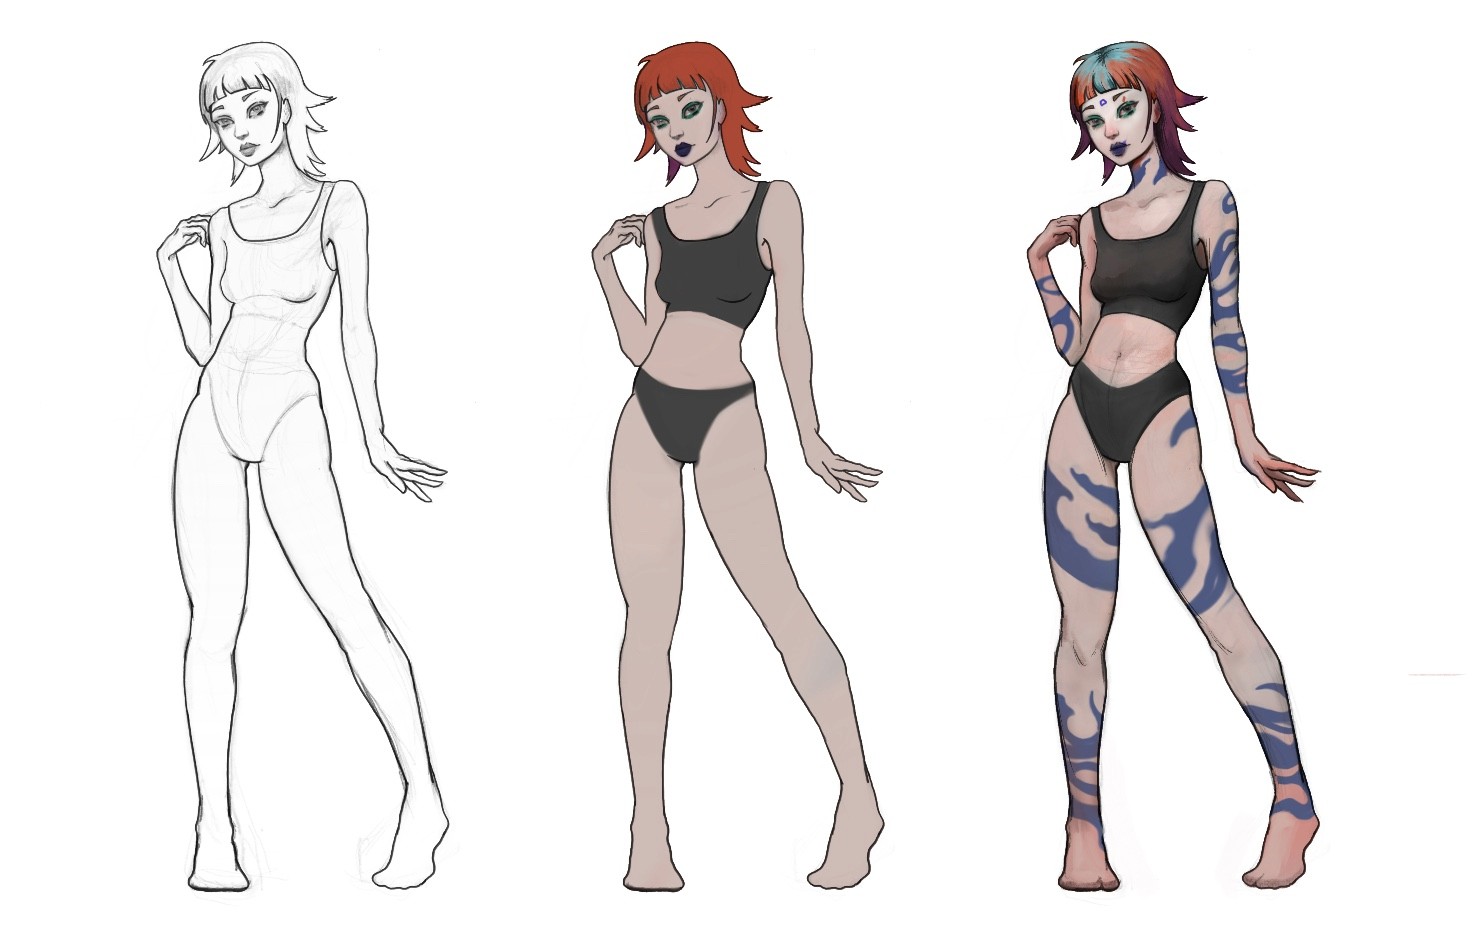
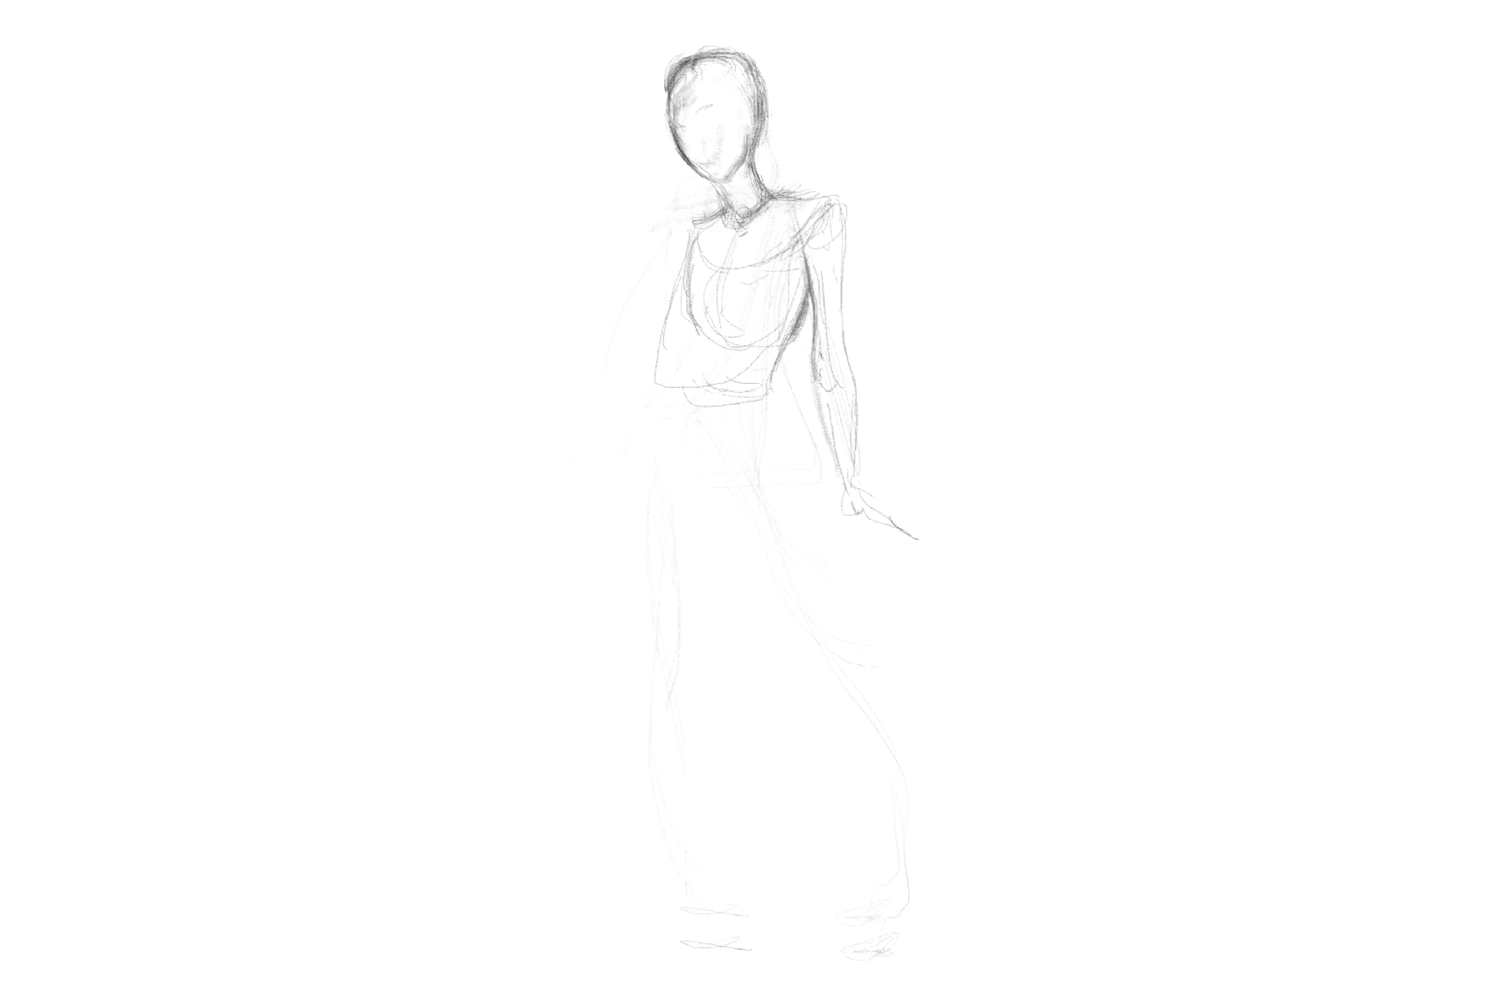
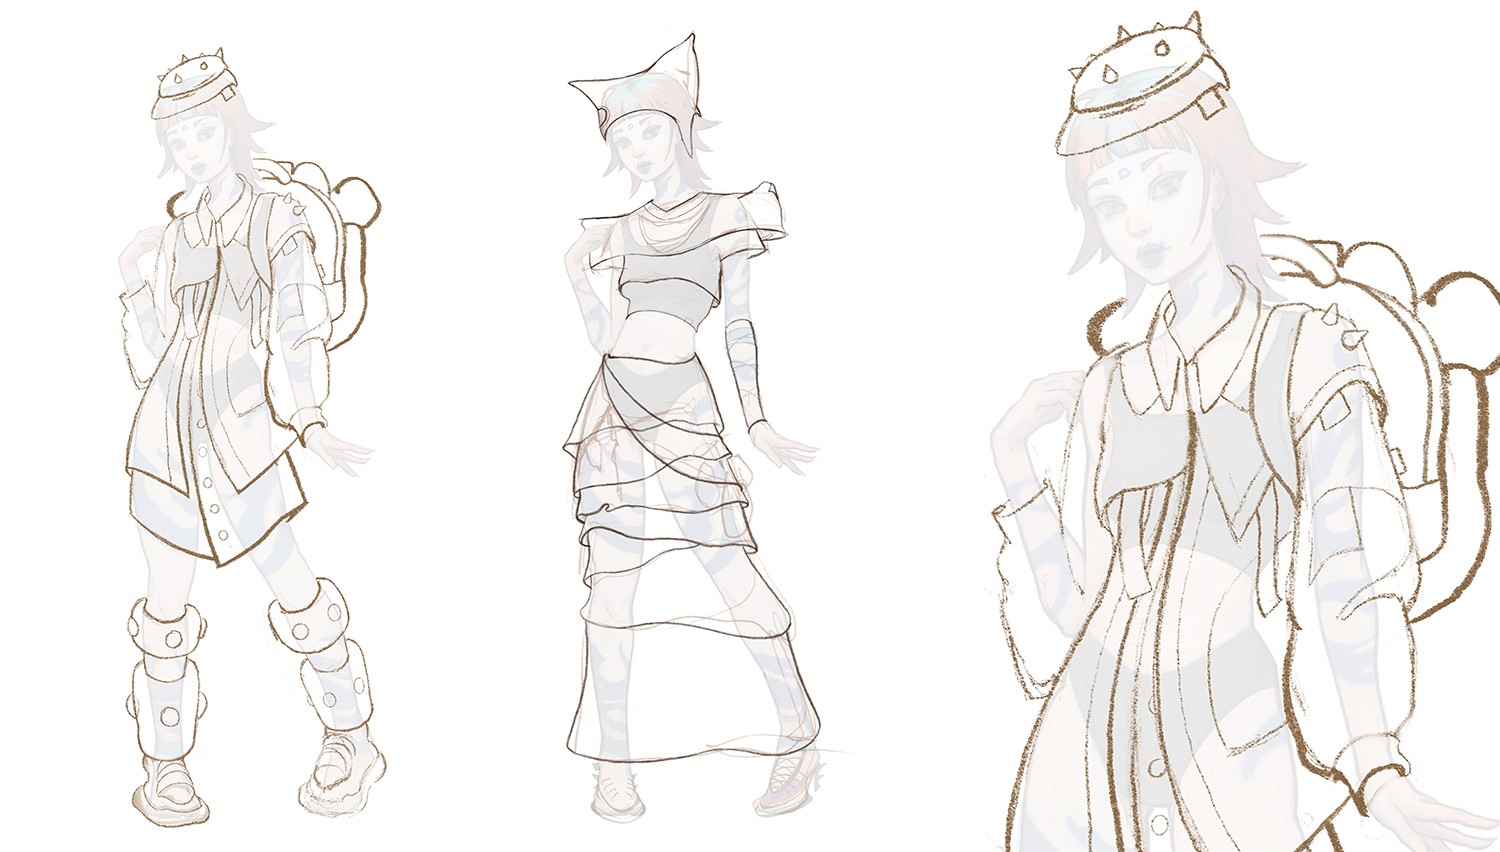
I begin with a gestural sketch, establishing a dynamic pose that will enhance the garment presentation. The pose you select dramatically affects how your designs read. Consider how a subtle hip shift can emphasize the fall of pants or skirts, while arm positioning can draw more attention to the construction of your sleeves or accessory details.
Once I've established rough proportions, I typically work systematically from head through shoulders and arms, down through torso to hips and legs. I aim for accuracy in this initial pass while knowing that refinement will be necessary. At this stage, focus on establishing proper proportions and gesture rather than pursuing perfection.
Next, I reduce the opacity of this initial sketch and create a refined outline of the entire figure. This allows me to evaluate the silhouette's clarity and assess whether the proportions feel balanced. I repeat this process a few times, lowering opacity and creating progressively cleaner linework, until arriving at the final character design. Each pass refines the forms and builds a confidence in my line quality.
In the demonstration below, you can see how loose and exploratory my initial sketches appear. I find it difficult produce clean linework in one single pass, so I rely on this layered approach of drawing over reduced-opacity sketches until the result feels resolved. This technique, which I learned at Otis College of Art and Design, is a really valuable skill digital illustration.
Translating Reference Into Original Designs
With the character model established, we can progress to the exciting phase of developing clothing exploration designs. Multiple approaches exist for this stage, you might work with silhouettes, loose sketches, or painterly explorations. Each method offers distinct advantages, and through experience you'll discover which aligns best with your creative process.
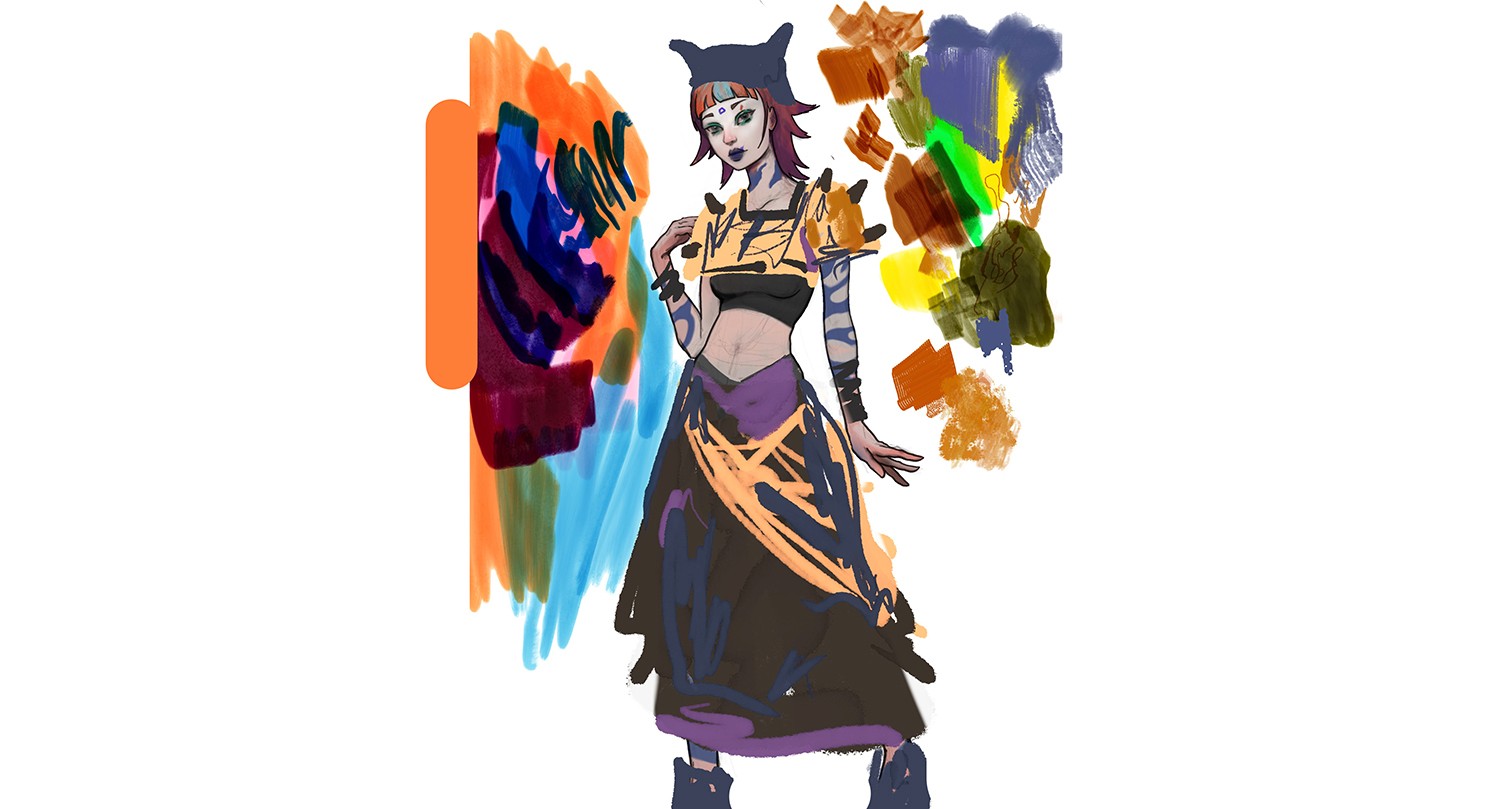
I began this exploration with loose painted sketches, as shown in the examples below. Drawing from the reference board assembled earlier, I begin painting designs that resonate with my vision. This serves as both warm-up and pressure-free exploration. In this exploration, I'm not concerned with polished execution, I'm pursuing compelling ideas and identifying what generates excitement. Often, the strongest design elements emerge from these spontaneous investigations.
I typically generate several of these exploratory sketches before committing to final designs. Consider them visual brainstorming sessions, you're building a personal library of ideas to draw from. While you could theoretically push one of these painted sketches to final rendering by continuing to paint, I wouldn't recommend it. The cleanup required can be a lot, and you forfeit the opportunity to refine the concept through line drawings
Developing Refined Design Sketches
At this point, we have finished both curated references and warm-up explorations, and are prepared to begin final design sketches. I like to start with rough line drawings that remain exploratory in nature as I discover appealing shapes and push silhouettes in compelling directions. I'm considering the overarching design vision and breaking up the outfit composition in visually interesting ways while referencing our previous explorations. Some key questions to ask yourself include: Where should the viewer's eye travel? What makes this design unique? How can I manipulate proportions to generate visual interest?
Even though these are rough sketches, I still maintain awareness of perspective and ensure clothing forms wrap convincingly around the body's three-dimensional structure. I don't want perfection, but establishing a solid foundation for the final linework will really help me out.
Note: Understanding fabric behavior; how it drapes, folds, and responds to the body's movement is fundamental for this stage.
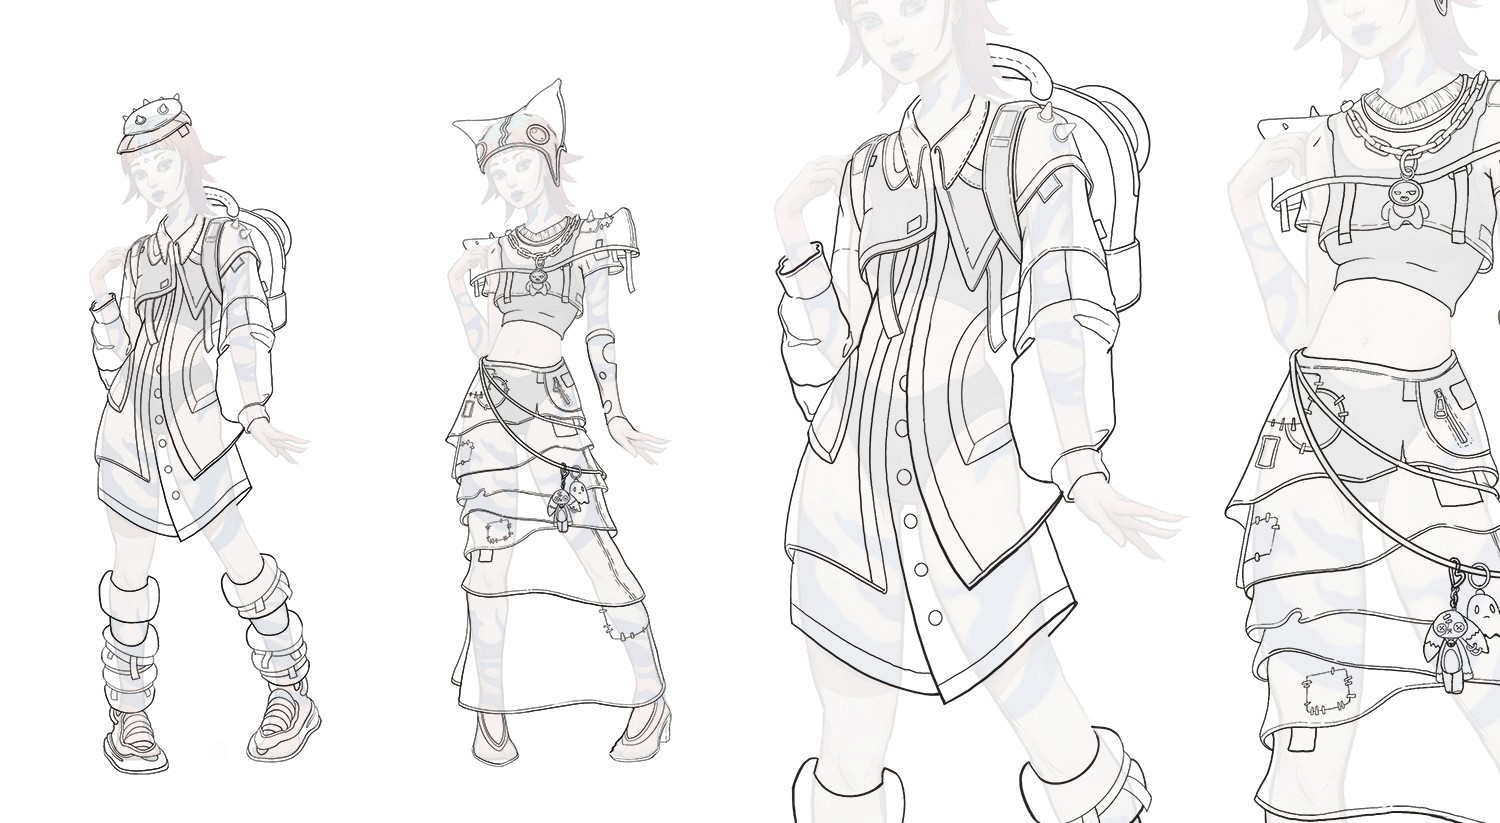
Executing the Final Line Drawing
The final line drawing is the last drawing stage before we start on the color and rendering process. Similar to the way we approached the character drawing, I reduce the opacity of rough sketch layers and start draw clean linework over them. For this particular project, I'm working in Procreate and using the 'Alpine' brush from the 'Pens' category in the Procreate Library. This brush produces really clean lines that help me the with the color-filling process.
Detail Refinement and Technical Considerations
During the final linework stage, I refine all details down to elements like stitching and seam treatments. How far you push this refinement depends on your rendering approach. I've found that the more information I establish in the line drawing, the less painting becomes necessary in later stages.
Critical technical note: When executing your line drawing, ensure all line edges connect cleanly. This proves essential for efficient color filling—properly closed shapes allow you to use fill tools effectively, dramatically streamlining the coloring process and preventing gaps that require tedious cleanup.
Understanding this technical foundation sets you up for success as we move into the color and rendering phase, where these carefully constructed line drawings will serve as the framework for bringing your designs to final life.